Friday, July 18, 2014

Bandage Cube Kit—budlcuber 03 & 04

In the last post I meandered my way from the Unbandaged Flying Carpets to budlcuber 02 with a quick mention of budlcuber 01, which was very similar to budlcuber 02. budlcuber 03 continues the series by adding the remainder of the edges. In my opinion it is not much more difficult than 02.

Here it is—budlcuber 03


And here is budlcuber 04—


I found this fully tiled version to be extremely challenging and so far have only solved it once. Had to come up with a brand new sequence to orient two corners at the end and then restore the edges that moved. I have this niggling feeling that there is probably an easier way.

Recap of versions
budlcuber 01—A green, orange, white frame, and a red, blue, yellow frame
budlcuber 02—Fill the blue, yellow, red frame with a 3x1x1 block
budlcuber 03—Add all the missing edges
budlcuber 04—Add all the missing corners

Algorithms
Green Front; Red Up—R FiLF2 RiDR B2 Orange Front; Yellow Up— From solved to working state

R2 Green Front; Red Up RiDiR F2LiF Ri— From working state to solved state

R2 U2 R U2 R2— FR > UR > BR > UL

(U2 Li U2 L) x 3— 12487

(U2 Li U2 L) x 5— FL > UL > UR

RiFR Ui RiFiR— Flip UL and UF (and move stuff all around)

(RiFR U RiFiR Ui) x 2— Flips FL UF UR UB

L-Sune U L-antisune ULiUiL (U2 Li U2 L) x 5 LiULU2—Twists 2 clock and 7 anti (no longer use)

L-Sune Ui L-antisune U2 LiUiL U2 (U2 Li U2 L) x 5 U2 LiULUi—1 anti and 2 clock (no longer use)

(L-Sune U2 L-antisune U2) x 2—8 clock and 2 anti (came up with this 8/11)

August 11, 2014
After working through most of Burgo's list, I decided to review my creation and wait until I have time to concentrate before moving on to the Very Hard ones. While doing mine this time I was trying to recall how the long corner twister works. Somewhere along the line I started wondering if there were any simpler Sune-based pure corner twisters that used only 2 sides. Came up with one, and added it above at the bottom of the list of algorithms.

Tuesday, July 15, 2014

Bandage Cube Kit—Unbandaged Flying Carpets & budlcuber 02

Today I solved the Unbandaged Flying Carpets, by Burgo. It was fun. He had posted—a long time ago—on the twistypuzzles.com forum. The interesting thing is that he posted pictures of the scrambled state, not solved. So part of the challenge was making your way to a place without knowing where you were going. I struggled to get the middle layer, but finally achieved it by trying to organize the 2x1 yellows somewhat. Then when I looked at the yellows all I needed to do was twist 3 corners to have a pattern that pleased me. I got "iii" on one side, and "iö" on the other side.

After solving Unbandaged Flying Carpets I felt like making my own bandaged cube, scrambling it, and posting it online. budlcuber 01 was very simple to solve. Well, when approached correctly it was. So I decided to make it a teeny bit more complex. Now I can't solve it! Here it is in scrambled state:


budlcuber 01 was the same puzzle minus the 3x1x1 block.

budlcuber 02 is almost solved, but even if I can figure out how to flip the last edge, I won't be able to tell you how I got to this point.

Here is what it looks like now. Perhaps it is time to just swap the tiles and start slowly and carefully analyzing it.


July 16, 2014
I tried last night but got nowhere and it was soon a mess again. I had just about decided to detile it and start over where I left off with the ones on Burgo's list on the forum. Another possibility was to break the 3x1x1 into a 2x1x1 and a 1x1x1, but I didn't really want to do that. The problem with this puzzle was that it seemed that the best I could do was have two layers that could twist. Sometimes only one. And even when I could twist two layers I couldn't get any familiar algorithms to work. I was so close to giving up, but decided to fiddle with it one more time today. This time instead of worrying about what I couldn't do, I just looked for things I could do, and wrote them down and recorded the affects. (I'm using Ri for R anti clockwise, because I don't like the way the F' looks.)

With Green on front and Red up, the first thing I tried was—
R RURi FiLiF RURi FiLF Ri
I wasn't overly impressed with the results so went back to solved. Next I tried—

R FiLF2 RiDR y
Surprise! Now L, M, and R can all move! Follow with
LiMiRi
and now L, M, R, and U can all move! So altogether we have—

R FiLF2 RiDR yxR2 from the solved state puts the

3x1x1 at the bottom in R;
The white 2x1 on the bottom at the back of the M slice;
The orange 2x1 on the front at the bottom of the M slice;
The 2x2x1on the bottom back in L.

And what can I do now?
  • The Sune Family! The cube, or at least the bottom layers need to be spun around for some. Example—(DE)2 Ri or y2 sets it up for a right-handed Sune.
  • LiUi LU and y2Ri RU RiUi.
Shortly after this I started experimenting with a solved 3x3x3 cube so I could better see where pieces were moving.
  • (Right-hand Sune) (DE)2 L (Left-hand Sune) Li (DE)2 RU RiU moves UF > UB > UR and twists corners 2, 7, and 8 clockwise. 
  • With the 3x1x1 in R do R2 U2 R U2 R2 to cycle FR > UR > BR > UL.
So now I am somewhat hopeful that with this knowledge I can maybe make some progress toward solving budlcuber 02. (Later) Almost there. The one corner isn't in the correct place. Maybe tomorrow. Good night.

July 17, 2014
Solved! But getting the last corner was a matter of trying the algorithms above in different combinations until something worked. Not real confident about it. I need a corner twister that doesn't move edges.

Breakthrough on another front. Mi U2 M Ri F2 R does a 5 cycle of corners and a 3 cycle of edges. After doing it for awhile I realized it could be shortened to these:
  • (U2 Li U2 L) x 3 cycles 1>2>4>8>7 A Pure Corner Cycle!
  • (U2 Li U2 L) x 5 cycles UL > UR > FL A Pure Edge Cycle!
To get back from the working state to solved state—
  • R2x'y' RiDiR F2LiF Ri
As far as the corner twister goes, Once all the edges are solved, get the corner to 1, twist it using Li Ui L U times 2 or 4, if necessary. Then move it into place using the pure 5 cycle. Then Use Li Ui L U times whatever until the edges are solved.

I think I've got everything I need to solve this little bugger. Ain't so impossible after all.

The finished product—


Monday, July 14, 2014

Bandage Cube Kit—Fuse-3


Solved!


After RUF' RU2R'


So solve to these and do

RU2R' FU'R' and its done!


Last night I discovered a way to twist 4 corners without cycling edges at the same time! Yay!


( ( R' F' ( R U R' U' ) F R ) (R' F2 y' ( R U2 R' U' R U' R' ) y ) ) x 2

I think of it as doing the RU corner swapper followed by an antisune, and doing it twice.
It twists 2 and 8 anti, and 4 and 6 clock. 2 is what I call UFR, 4 is DFL, 6 is DBR, and 8 is UBL.

Then later there was cause for more rejoicing. Whereas the first discovery was the result of deliberate documentation, the second one was stumbled upon while scrambling. After a few twists I realized that all three 2x1x1 posts were planted in the F2L. After solving it, further experimentation uncovered the way to get there from the place where the 2x1x1 pieces are solved—RUF' RU2R'. This state allows use of F RUR'U' F' and its buddy, for flipping edges. It also allows for the Sune family of cycling edges and twisting corners, which may make the previously mentioned discovery obsolete. 


While on the topic of Sune, I'd like to mention a very nice little Word document that Burgo put online that has a way to use Sune to do a pure 3-cycle of edges. Right-handed Sune, y, Left-handed Sune, y' cycles UF > UL > UB. After undoing the setup with RU2R' FU'R' it translates to FD > UB > UL.


In the previous post I included some algorithms. I don't know exactly how many I will actually use now, but here is a more complete list:


Solving the 2x1x1 Pieces
Something that can help in some situations to get the 3 2x1x1 pieces is R ( U R U' R' ) or ( R U R' U' ) R'.

3-cycle of Corners
3>4>2 followed by 3>6>2 followed by 4>3>2 cycles 2>6>4 and returns the 3 2x1x1 pieces to their solved state.

Corner Swappers and Twisters
R' F' ( R U R' U' ) F R swaps 2 and 4, and 6 and 8, and cycles edges.
R' F' ( R U R' U' ) x 2 F R twists 2 and 4 clock, and 6 and 8 anti, and cycles edges.
R' F' ( R U R' U' ) x 4 F R twists 2 and 4 anti, and 6 and 8 clock, and cycles edges.

F R ( F' U' F U ) R U R2 F' swaps only 2 and 4, and cycles edges.


( ( R' F' ( R U R' U' ) F R ) (R' F2 y' ( R U2 R' U' R U' R' ) y ) ) x 2 twists 2 and 8, and 4 and 6 without cycling edges.


3-cycle of Edges

R' F' ( R U R' U' ) F R swaps some corners and does FD > RB > UB.
R' F2 y' ( R U R' U R U2 R' ) y F2 R swaps some corners and does FD > RB > UB.

( RUF' RU2R' ), Right-handed Sune, y, Left-handed Sune, y' ( RU2R' FU'R' ) 

cycles FD > UB > UL with no corners affected.

Edge Flippers

( R' F' ( R U R' U' ) F R ) (R' F2 y' ( R U2 R' U' R U' R' ) y F2 R ) 
flips FD and UB and swaps corners.
( R' F' ( R U R' U' ) F R ) (R' F2 y' ( R U R' U R U2 R' ) y F2 R ) 
flips FD and RB and swaps corners.

Alternately, one could just solve to the above picture using familiar algorithms, and be 6 twists from solved! :D


Strategy:
  1. Solve the 2x1x1 pieces.
  2. Check corners and permute if necessary.
  3. With white up, solve the two middle layer edges.
  4. RUF' RU2R'
  5. Solve the edges.
  6. Solve the corners.
  7. RU2R' FU'R'
Conclusion:
Although only a small handful of algorithms are actually needed, it was fun coming up with all of these and sorting through them to come up with a strategy.

Saturday, July 12, 2014

Bandage Cube Kit—Fuse-3 Partially Detiled

Note: This is more of a story than a solution guide. Check later posts for more about the Fused-3 Bandage Cube.

The Detiled Corners Only Fuse-3 was a challenge at first, but then became relatively simple compared to the monster I created by adding a couple edges to it. Here is what the Detiled Corners Only Fuse-3 looks like with centers and complete corners.


Below you can see it with one edge added. In this case the green-white edge. I solved this one at least once. Hiding the edge using the 4-cycle of corners, then putting it back after doing whatever needs to be done with the corners seems to be the ticket.


Next I tried the one below and could not do it.


The one below, which I thought would be simpler, proved to be challenging as well. It wasn't until I posted these pictures and noticed the 2x2x3 block, that I thought the Petrus technique of building the 2x2x3 block then orienting edges might work. My first attempt worked, but I've been puzzling enough to know that might not mean it will always be so easy. Second attempt did not work out so well. So much for the Petrus method. I guess I got lucky the first time.

Another approach. Before solving the two edges make sure the corners are in a double swap situation.  Solve the two edges; keep checking the corners. When moving and twisting corners move the edge in danger to a safe spot before the move or twist. Sometimes it is a bit complicated, but it worked, and I got solve #2. Repeatable? Rememberable? We'll see.

First of all, if there are no added edges to worry about, the algorithm for swapping URF and DLF (2 and 4), and ULB and DRB (6 and 8), is quite simple: ( R' F' ) ( R U R' U' ) ( F R ). When you want to manipulate corners without disturbing the 2 placed edges, it gets more complicated, as the edges need to be moved out of the path of the corner swaps.

With red on the right and white on the front, ( R' F2 U F U ) ( R' F R F' ) ( U' F' U' F2 R ) does a double swap of corners. URF and DLF (2 and 4), and ULB and DRB (6 and 8). Same thing can be used with ( R' F R F' ) x 2 to twist 2 and 4 clockwise and 6 and 8 anti clockwise. Likewise x 4 twists 2 and 4 anti clockwise and 6 and 8 clockwise.

But what if red is on the front and white is on top and I want to swap 2 and 4? I could just use ( R' F' ) ( R U R' U' ) x 3 ( F R ). But that will not work for the twists that may be needed later.

3-cycle corners 3>4>2 then 3>6>2; then do ( R F' U2 F ) ( R U R' U' ) x 2 ( F' U2 F R' ); then cycle the corners back. It twists 2 and 4 anti, and 6 and 8 clock. There must be an easier way to protect those two edges! It isn't really difficult, but it is 48 twists.

Lastly, what if red is up and white on the right? ( R' F2 U2 F ) ( R U R' U' ) ( F' U2 F2 R )


The more edges that are added the more difficult it will be to use this method, as it relies on having 3 detiled edges that won't be affected by the EPS. I can't imagine how the fully tiled Fuse-3 can be solved. But for now let's get down what we have so far.

After solving the 3 2x1x1 pieces check to see if the corners are in a double swap OR fully permuted situation. It is important they get in one of these positions and remain so for the rest of the solve. The reason for this is that the 3-cycle of corners also moves edges. Perhaps it would be easy to find ways to hide the edges before the 3-cycle. Something else to think about.

Solving the 2x1x1 Pieces
Something that can help in some situations to get the 3 2x1x1 pieces is R ( U R U' R' ) or ( R U R' U' ) R'.

3-cycle of Corners
3>4>2 followed by 3>6>2 followed by 4>3>2 cycles 2>6>4 and returns the 3 2x1x1 pieces to their solved state.

Corner Swappers and Twisters
R' F' ( R U R' U' ) F R swaps 2 and 4, and 6 and 8.
R' F' ( R U R' U' ) x 2 F R twists 2 and 4 clock, and 6 and 8 anti.
R' F' ( R U R' U' ) x 4 F R twists 2 and 4 anti, and 6 and 8 clock.

F R ( F' U' F U ) R U R2 F' swaps only 2 and 4.

Thursday, July 10, 2014

Bandage Cube Kit—Detiled Corners Only Fuse-3

Progress on the Bandage Kit has been coming along nicely. I hit a road bump though with the Detiled Corners Only Fuse-3. I could get close but not quite get it. One time it was a single swap of corners that had me befuddled. Another time it was a 3-cycle, of all things. And then it was a 4-cycle. All I really knew how to do was a double-swap of corners.

It was time for some serious analysis and note-taking. Although some puzzlers do not enjoy this approach, for me it is quite enjoyable and satisfying. Although most of the Bandage Cubes so far haven't required this rigor, the Detiled Fuse-3 did.

Here is a picture showing a couple relaxed puzzlers with the Bandage Cube in the background.


And here is a picture showing some of my notes, the Detiled Fuse-3, not so detiled, but with only one edge tiled that was blank in the fully detiled one. Also featured are the guys we made with some of the leftover pieces.


Sunday, June 29, 2014

Bandage Cube Kit—Corner Road

Recap: In my revisit of the All-in-one bandage cube kit recently I've worked through the one I saw recently on Twisty Puzzling's youtube channel, then the 2-bar, 3-slices, fuse, big block, and bandaged 3. I bookmarked Seth—themathkid's Bandaged Cubes Google Doc, and at the bottom of the Easy Ones section is one called Corner Road.
We went for a walk today, and on my way out the door I grabbed what I thought was the Bandage Kit Corner Road. What I actually grabbed was my Mefferts bicube. On my walk I managed to scramble it, and start solving it. After we got home, we had a play in the pool then, after the kids went in, I sat outside and worked on it some more. I finally managed to get almost 2 layers just trying different things that didn't mess up anything else I'd done. Dinner time. After dinner I got back to it and thought, hmmm, this looks a lot like the bicube. I wonder if any of the algorithms I worked out for it will work. They did. It wasn't until it was completely solved that I realized it was the bicube! :oops: I think I'm losing my mind.
So then I went and got the Corner Road. It was a bear to scramble, but I was finally satisfied that it was scrambled sufficiently. When trying to solve it I'm getting absolutely nowhere! This is supposed to be easy? The bicube seems easier to me. Perhaps tomorrow things will make more sense.
It wasn't easy, but I finally got the 2x2x2 block together, but the corner was twisted. It was another hassle to get it oriented correctly. I only have a vague idea how I did it. Then I figured it was all downhill from there, as I could simply solve it using my bicube method. Or so I thought. I ended up with two swapped pieces. That has never happened to me with the bicube!


(Later) Well... it turns out that someone put the Cross Road pics, which are actually classified as difficult, on the Corner Road. Some investigating on the twistypuzzles.com forum revealed the true, relatively simple Corner Road config. I am no longer going to trust the Google Doc.

The true Corner Road was indeed pretty easy. 

Getting reacquainted with Jeay's Working Corner Method

This summer we packed 30 or so puzzles and flew to visit Raymond and Fam in the Czech Republic. Breann, who had learned this method and no other, made some comment about bubururu or something like that, and it piqued my curiosity. What were those algorithms, and how similar are they to the EPS technique I use now when using a working corner? So I looked them up. Actually, the three algorithms were for dealing with the two last edges solved, which either needed to be swapped, or flipped, or swapped and flipped. The swapper is very similar to the one I have learned and used since, but I actually like it better in one sense, with a slight modification.

To swap UR and FR without flipping:
U' R U' R' U' R U' R' U'

To swap and flip UR and FR:
F' U' F U' F' U' F U2

To flip UR and FR:
F' U F U' R U' R' U

Will I actually learn and use these? Probably not, since I usually solve either Corners First or F2L, but I like them. :)

Sunday, June 22, 2014

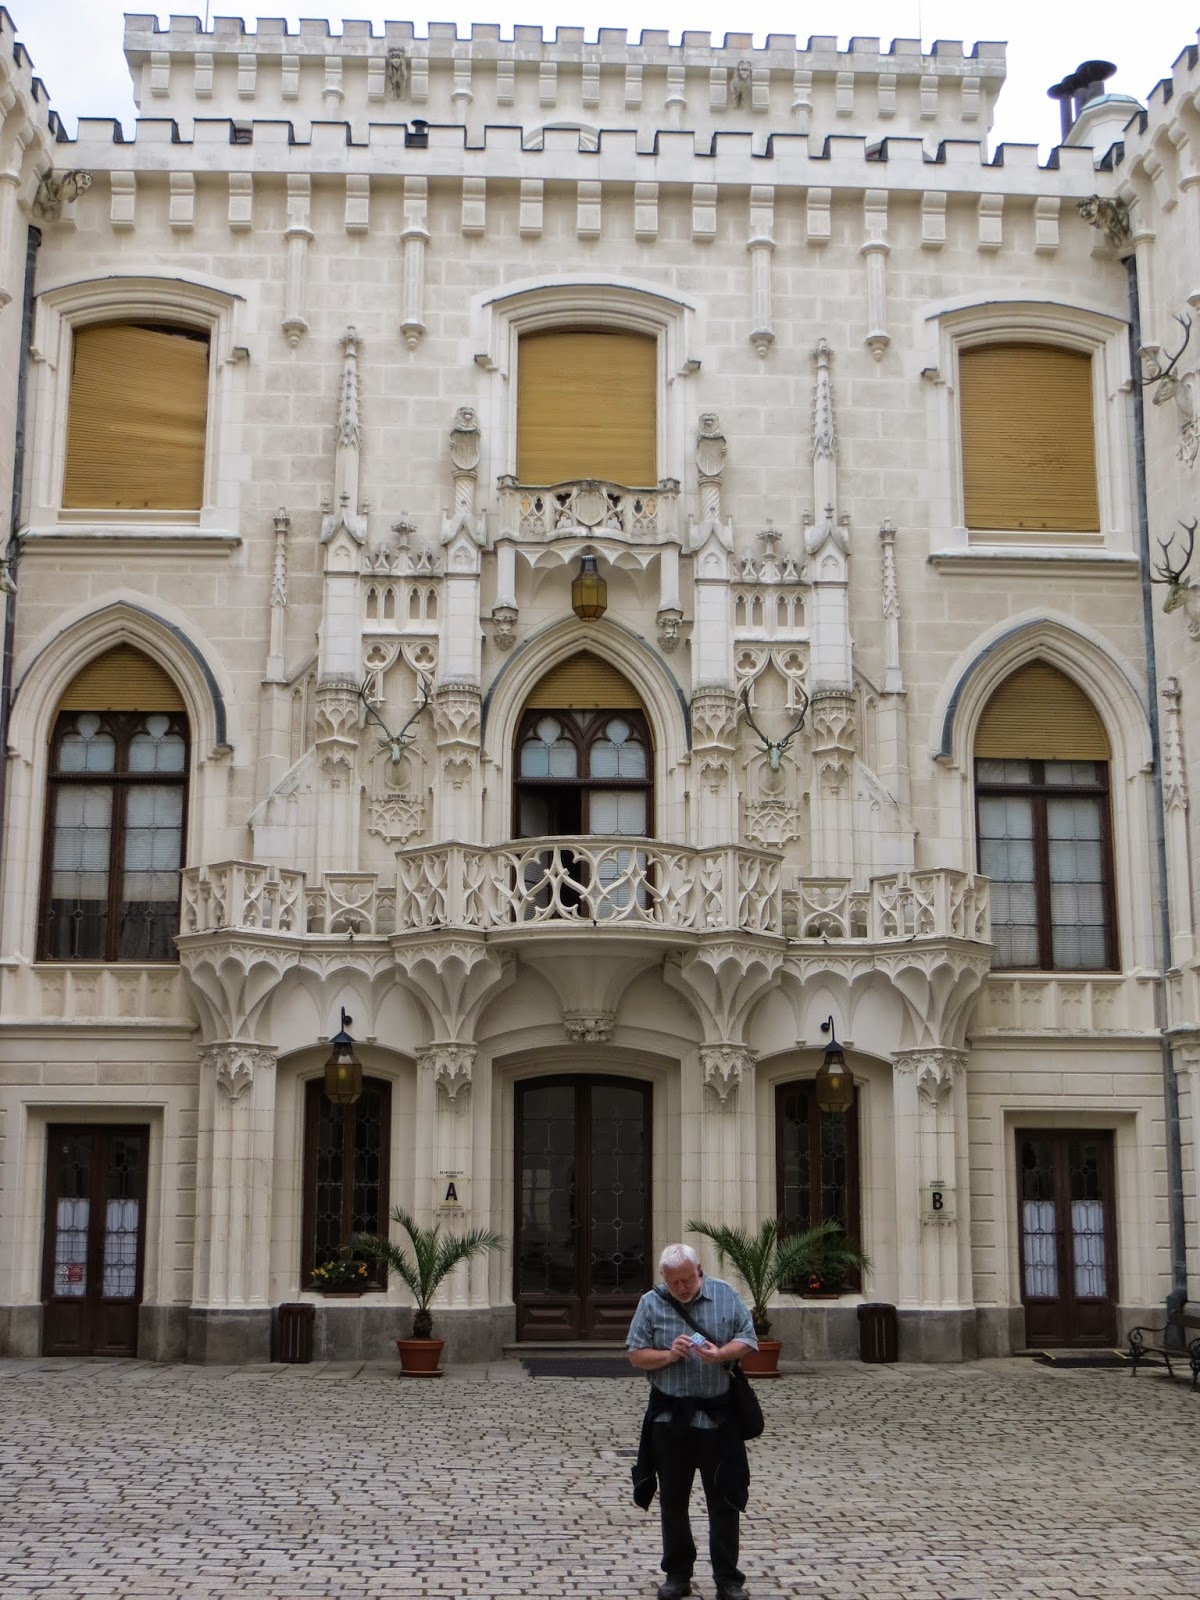
Hluboká Castle


"Bud, don't just sit on that bench trying to remember how to solve your Square-1!"


"All right, I'll move to the other bench. And it isn't just a Square-1. It's a Super Square-1, and I can't get the middle layers back to squares."

"No, no, no. Get up. Go out in the courtyard!"


"Fine. I'm in the courtyard. Happy?"

Seriously, this castle and the grounds around it are absolutely beautiful. These three pictures were taken by my son at my request, but most of the time I was taking pictures and enjoying the sights with my family. Check out my Flickr photo page if you'd like. LINK

And seriously, the Super Square-1 was quite a challenge. Even using the notes I compiled when I first figured it out long ago, it was a challenge. I thought about starting from scratch, looking for another way to solve it, but gave that idea up quickly. I thought about throwing it away. I thought about giving it away. But in the end I worked through my notes and refined them somewhat to make them easier to remember. :D

Alex and the 2x2x1

Alex is focused very seriously on the 2x2x1 while his family (which I graciously cropped out) is clowning around around him.


Thursday, June 12, 2014

Puzzling With Annie in the Garden


We have been visiting our son, Raymond, and his family in the Czech Republic. About 30 or so puzzles accompanied us. :] All my puzzles have been solved at one time or another, but many had not been solved yet in 2014. That is a situation being remedied this summer. It is the Dayan Gem IV's turn today.

One of the puzzle highlights of the summer is an opportunity to show a local young man how to solve a cube. This week we talked about solving the first two layers. He had done so some years back but had forgotten how. Next week perhaps we can review the first two layers and go on to the last layer.

A daily puzzle delight has been puzzling with my 3-year old granddaughter. We have discussed the differences between a cube, a tetrahedron, a dodecahedron, an octahedron, a curvy kite hexahedron, and a truncated octahedron. :] She especially likes the gear puzzles, and is good at identifying which pieces still need solved on all the puzzles. Above she is completing her two-twist solve of the megaminx.

Besides puzzling we had a blast today going to the local zoo and then to a playground for a picnic. I was surprised to see a baseball field at the park. I didn't think Europeans played baseball. The zoo pictures are uploaded to my flickr page.

Monday, June 9, 2014

Prague


What fun it was to see some of the highlights of Prague with the family yesterday. And of course there were opportunities to become re-acquainted and better acquainted with a long neglected puzzle—The Gear Cube Extreme.

Friday, May 23, 2014

Ghost Cube


The Ghost Cube came into my life almost two weeks ago. After the initial greeting, I admired it from a distance for a week. Finally I scrambled it. It was a bugger to find two pieces that went side by side. I was trying to be systematic, but that is really hard. Once though, when I chanced to turn the puzzle around, Bam! A center, edge, and corner had come together without any effort on my part. Yay! A start. As I built my way around the center I had this niggling fear that I might be in for an unpleasant surprise because of the fact that the puzzle when solved is not in 3x3x3 form. Oh, did I mention that during this solve I did not use any reference photos to see what went where? It is now solved and I have several observations.

  1. This is a hand mod version, not a mass produced version. During the solve I noticed that one of the centers that ends up as a corner of the solved cube, was not made exactly right. The vertex sticks out a little bit further than it should in one direction. 
  2. Two of the centers end up as corners of the solved cube. One of these two should be the starting point of the solve. 
  3. When a weird shaped piece needs to twist in place, I have a terrible time visualizing which way it should go.
  4. When I do a 3-cycle of corners on a standard cube I know which orientation two of them are going to end up with. Not so with this beast.

I think before I scramble it again I should try some familiar moves and see what happens. Perhaps I can start seeing more clearly, and rely less on try-it-and-see.

May 25, 2014
I have not made any attempt to memorize what goes where, as it seems that would defeat the purpose of the challenge of this puzzle. But after 3 solves I am beginning to be able to see a little more clearly. I still maintain that one of the two centers that end up on a corner of the cube should be the starting point, although I can't tell them apart so don't know if one or the other would be better. I have also developed a favorite edge to start with—the long one that has three surfaces.

I'm getting a feel for which way to twist corners, and I've noticed a difference between the middle layer edges and the top and bottom layer edges.

Although it is making a bit more sense than at first, there is still an amount of "maybe this one goes there" type thinking.

So far I've been using a straight layer-by-layer approach and after the first layer have to shift back and forth a lot between cube form and 3x3x3 form.

When I first learned how to solve a Rubik's Cube, I learned a working corner technique, a layer-by-layer method, a corners first method, an edges first method, some F2L techniques, and even tried the Petrus method. I can not imagine ever being able to solve the Ghost Cube corners first. When solving a cube now it is usually either F2L or Corners First, so I rarely use the algorithm I learned for placing middle layer edges, but now we are becoming good friends. :D Perhaps I should try some of the other methods.

May 27, 2014
Layer-by-Layer works and is the first method I tried since it allowed me to complete a layer at a time, which was important as I was getting used to seeing how the pieces fit together. But the algorithm for inserting middle layer pieces, although I like it as far as algorithms go, seemed unnecessary once I realized the Working Corner method could be used. In the latest solve the Working Corner method worked well. Instead of R'URU' F'U'FU to insert a middle layer edge, it only took something like RUR'. On the last corner and edge I tried to figure out how to join them and insert them together, but couldn't figure it out, so ended up easily inserting the edge, then using a 3-cycle to put the corner in.

For the last layer, whether I used the Layer-by-Layer method or the Working Corner method, I orient edges, place edges, place corners, orient corners.

Recap of methods: The Corners First method is not going to happen on the Ghost Cube. Edges First might work, but inserting the corners in the first layer is not difficult and is a tremendous help visually. At this point in my familiarity with the pieces, F2L would be a matter of finding a corner, keeping track of it while finding an edge, figuring out how to make them fit together correctly, and inserting them together as a pair. Seems to me like it would be a lot harder than the Working Corner method.

Now what? More Working Corner solves in which I try to insert the last corner-edge pair together.

May 28, 2014
It is settled. After considering each of the solving strategies I am familiar with, the Working Corner Method is my strategy of choice for the Ghost Cube.

I did not start this process by studying the pieces of the cube carefully. Just scramble and go. Needless to say that first solve took a long time, involved much trial and error, and I could hardly tell the difference between an edge and a corner! Since then I have looked at the pieces in the solved state and noticed some similarities and symmetries. Very helpful. It is still the most challenging 3x3x3 shape mod I've ever experienced and I still sometimes have a hard time finding the right piece for a particular spot. But there is definite progress. One major breakthrough came by taking a hard look at the middle layer center pieces in solved state. I no longer have to twist centers as many times as I used to, in order to find the correct orientation. In my last solve I was down to the last 4 corners, but when I looked at them I decided it was cute the way it was, so I declared it a new solved state. I give you Ghost Cube Man—


May 31, 2014
I was curious to know how others solve the Ghost Cube, so I asked on the Puzzle Photography page, but did not get much response. Thank you Otis Cheng for sharing your approach. So I messaged rline and Burgo asking specifically how they go about it. rline has a unique method. I tried it a couple times, at least I tried following the sequence of steps. He did not go into detail as to how he did each step. Although I do not enjoy my implementation of his steps, I feel that I learned something from trying nonetheless and have refined my solves somewhat. Here is what I have now—

Most of Layer 1

  • One of the two columns made up of a center-edge pair that make up one edge of the solved cube.
  • The other 3 edges around this same center.
  • 3 of the 4 corners around this same center.

Use the Working Corner to solve the Middle Layer

  • Use the working corner to orient the middle layer centers one at a time.
  • Use the working corner to solve the middle layer edges.
  • When the middle layer is complete solve the working corner corner.

Last Layer

  • Orient edges.
  • Permute edges.
  • 3-cycle corners.
  • Orient corners.
As I have mentioned previously, the middle layer centers can give me fits. Some things I have learned that can be helpful—

Each has a triangle side. The triangle sides of the correct two adjacent centers can be oriented to lie on a plane. The triangle sides of the other two centers lie on a parallel plane. The hexagon shaped pieces go between these centers. The smallest triangle and the largest triangle go together, but if you forget to check that and are just trying to find which two work together, and two look like maybe they are on a plane, but neither hexagon piece will work with them, those centers need to be on the top of the middle layer rather than the bottom.

Thursday, May 22, 2014

6x6x6 Solve—A Surprise

Introduction

Kevin and I have been going back and forth discussing ways to solve the 6x6x6 in which parity is not a problem. There have been references to SuperAntonioVivaldi and Twisty Puzzling and their methods. I made an attempt to utilize some of their techniques to come up with a way to solve the 6x6x6 in a different way than I normally solve big cubes. In the end I decided my old method suits me best.

One Last Experiment

Kevin's focus in solving the 6x6x6 without parity is to reduce it, not to a 3x3x3, but to a 2x2x2. Today I thought it would be interesting to use my old method, with a minor change, to do just that. When solving the corners early in the solve, instead of orienting and permuting them, I would only orient them. Then when solving the rest of the puzzle using my old method, I would solve to the corners, wherever they happened to be. In other words, I would use my old method to reduce the 6x6x6 to a 2x2x2. It complicated things a bit both visually and in eliminating some shortcuts and options during the solve, but it is pretty much using my old method to reduce the 6x6x6 to a 2x2x2. See for yourself.

Scrambled

White and Yellow Centers
Corners Oriented
Fill in 3 of the 4 White Edge Rows
Fill in 3 Yellow Edge Rows
Insert Last Yellow Edge Backward into Whites
Solving White Solves the Yellow Too
Middle Layer Edges on the White Half of the Puzzle
Middle Layer Edges on the Yellow Half
Making Progress on Centers
Almost There
Centers Solved
2x2x2 Solved

Thursday, May 15, 2014

6x6x6 Swapped Edges

I solved this puzzle a couple times using the same approach as with a 4x4x4—

  1. White and Yellow Centers
  2. 8 Corners
  3. White and Yellow Edges
  4. Middle Layer Edges
  5. Middle Layer Centers

There is never a parity issue when doing it this way. Never. But then I read that Kevin Sadler has a different way of solving it that also avoids parity. I tried following his outline but obviously did something wrong because at the end it looked like

Monday, May 12, 2014

Four Newish Puzzles

Earlier this spring our house was broken into during the day. Among other things about half my puzzle collection was stolen. Around 40 puzzles. You know, twisty puzzles. Like Rubik's Cubes.

Today in the mail I received a box from overseas with 4 puzzles:

A new Buzzle Ball. I scrambled it once and managed to solve it using primarily the fiddle around trying to figure it out method. I'm looking forward to getting better acquainted with this strange new twisty puzzle.

An old flat-sided V-Cube 6 that probably hadn't been used very much because it isn't very easy to turn. From what I've seen online the new pillowed V-Cube 6 is much much better. I've never had a 6x6x6 cube, so it is nice to have one now. Among the puzzles stolen was a V-Cube 7, an Eastsheen 5x5x5, and a variety of 4x4x4's. So the old V-Cube 6 is my one and only big cube now. I like the weight and size  and shape of it and plan to have more fun with it whenever I get the urge to solve a big cube.

A 2x2x2 cube. My old 2x2x2 cube was stolen! The Rubik's Ice Cube in the drawer doesn't even count as a 2x2x2 as far as playability goes. It is nice to have a good 2x2x2 again. It seems to turn better than the Eastsheen I had, too.

A Hungab Ghost Cube. I've seen some of the Ghost Cube hype online, but didn't think I would get one. I've been in a bit of a slump puzzle-wise for several months. I bought an Evil Eye 2 months ago and only got around to playing with it this month. When a puzzle friend from around the world offered to give me a Ghost Cube, along with the other 3 puzzles, you can imagine that my interest in Ghost Cubes spiked! This thing is beautiful.


Thursday, April 24, 2014

Squirrel Friends

A colleague at CTB introduced me to her squirrel friends. Today I had a good chance to share lunch with them. Sitting on the backseat of my car with my feet on the ground, I held a piece of peanut butter sandwich where the squirrels could take it out of my hand if they would come up to me. A couple of them did.


Monday, February 17, 2014

Curvy Rhombohedron Skewb

The first couple solves I just started putting pieces together that looked like they needed to be put together. Eventually a 3-cycle or a twist or two needed to be done to finish up and I drew from my Skewb Family Arsenal of Algorithms (I just made that up).

But then Kevin asked how I solve the Skewb, so I got out the Skewb Cube and solved it. Then the Tetrahedral Skewb. Then the Squished Skewb. Then I intentionally tried to use the same strategy to solve the Curvy Rhombo Skewb.

Documented Scramble #1: DNF
After getting the first 8 pieces solved, leaving only 6 to go, the thing still looked scrambled! After using a setup move and the 3-cycle to place 2 of the 6 pieces, and not being able to see how to undo the simple setup move, I decided that although it is possible to solve in the same way, a more intuitive approach would be better.

Documented Scramble #2:
After solving the yellow layer, including the green and purple triangle center pieces, one twist of the black layer was needed to solve the 3 remaining triangle center pieces. That left the 3 remaining edges out of place and the remaining corner twisted. After using Double-EPS to place the edges instead of the pure 3-cycle, both of the diagonally opposite corner pieces needed twisted. I don't think it is possible to twist them together, so I twisted each one with a triangle using an algorithm that hadn't been used in any of the previous posts' solves. I will not even attempt to type it out.


So it turns out I not only demonstrated the algorithm. I also showed what happens when unexpected results happen, and one way to solve mysteries! :D

Documented Scramble #3:
Very difficult to get the yellow layer this time. The first several times I tried it this way it seemed almost trivial to get a layer solved. But this time, either it was a different scramble, or my mind wasn't in sync with the puzzle as before. This can be a problem when solving intuitively rather than with a systematic strategy. I ended up using Triple-EPS a couple times to swap pieces into place on the yellow layer.

After solving most of the black layer as described in #2, once again I ended up with the 2 small corners twisted. Two lessons to learn. First, if I would use the same steps as I do with other Skewb puzzles, I wouldn't have this problem at the end. So is it worth it to work through a more visually challenging solve at the beginning to make the endgame go more smoothly?

Secondly, it dawned on me that one conclusion I made in #2 above is incorrect. I said "I don't think it is possible to twist them together," because one is in the corner role and the other in the center role (thinking of the Tetrahedral Skewb). But what did I learn in the video above? I can twist 1 corner and 3 triangles, in the unshapeshifted puzzle, and 2 of the triangles are centers! So I can twist a corner and a center together! Yay!


In conclusion... well, is it ever really concluded? Let's just say that after several more solves I have decided that at this point I rather like solving it using the same basic approach taken with the other Skewb Family puzzles. That is, get the 2 small corners and the 6 triangles first. This only takes a few simple twists. Maybe 1 EPS. So with half a dozen twists or less more than half the puzzle is solved! Then 3-cycle the 6 big pieces home.

If a corner needs twisted without disturbing triangles, up twist down replace up twist-the-other-way down go-back works well and is pretty simple. Let's see.


Bottom line though, with this puzzle, as with any puzzle, there is no right or wrong, easy or hard, better or worse, way to solve it. I may decide on a favorite way to solve it tonight, but 6 months from now pick it up and take a whole different approach. I suppose I should demonstrate the Preferred Method applied to this one, so

Documented Scramble #4: